
DJI Matrice M300-350 Retrofit Kit
What's in the box
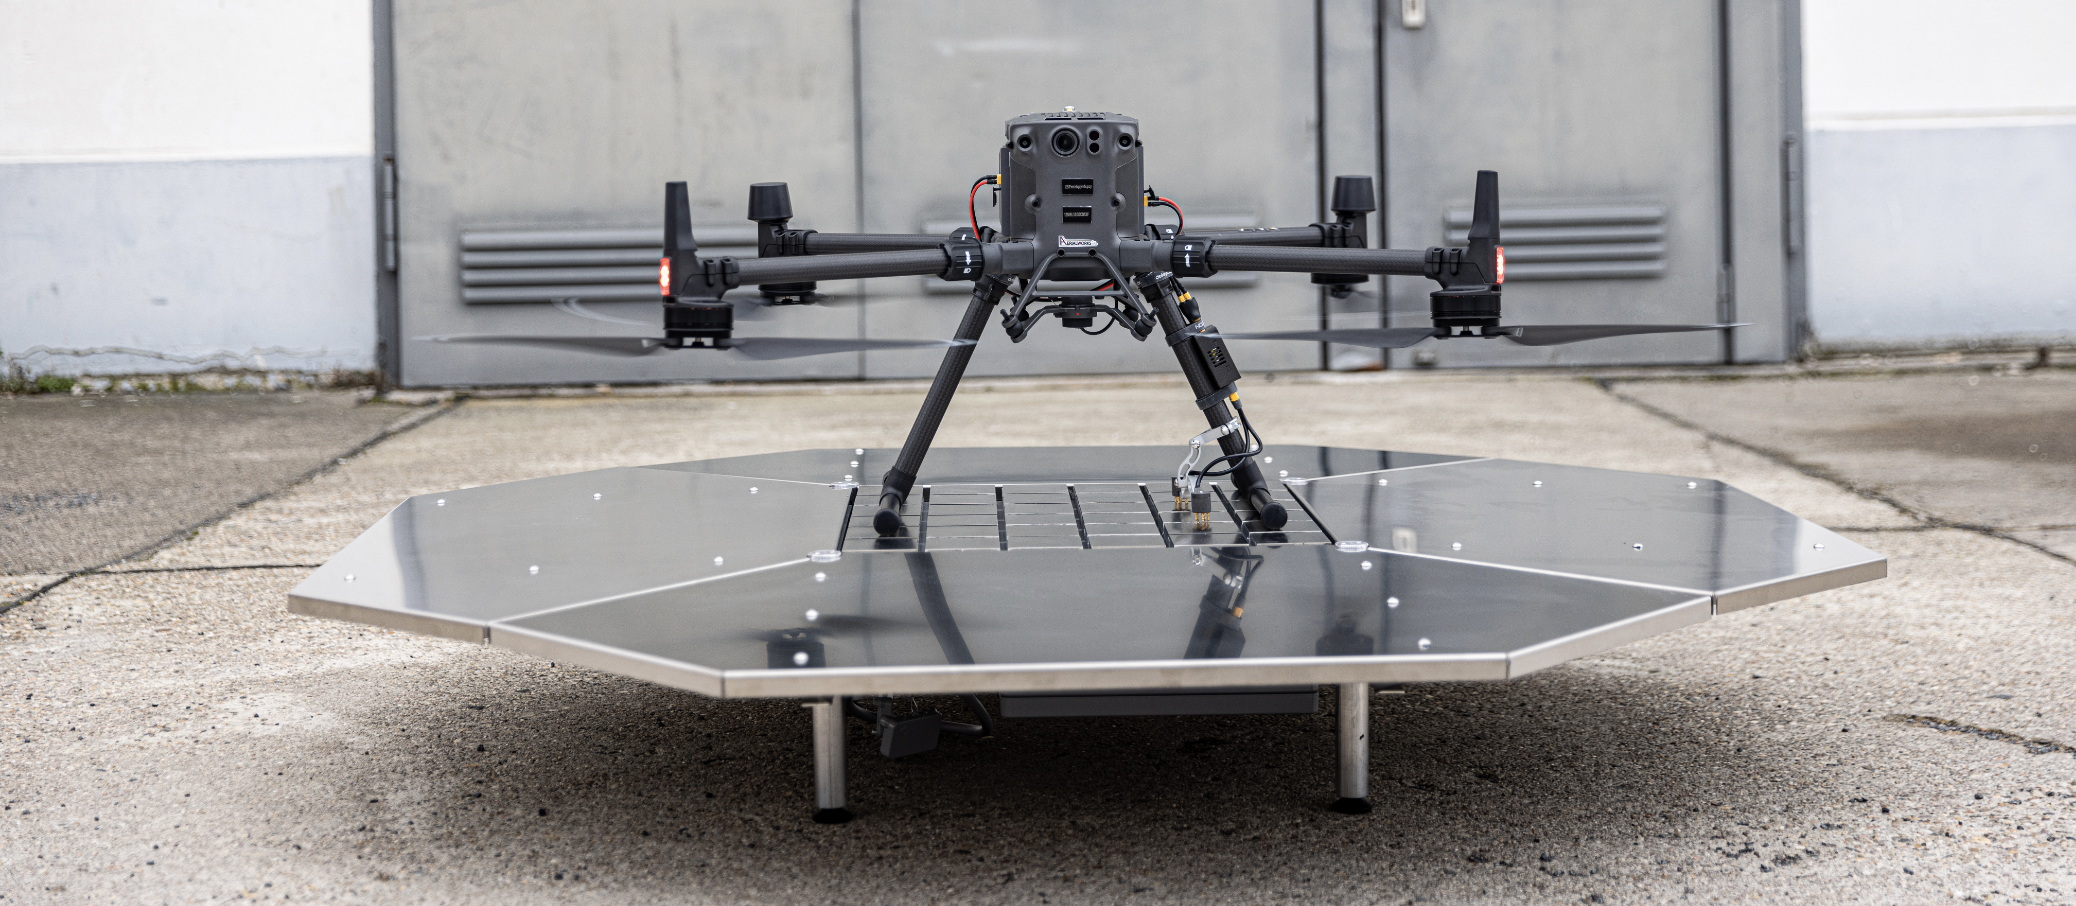
The DJI M300 Retrofit kit allows your M300 drone to charge its battery automatically by landing onto any Skycharge docking system.
Retrofit kit components
- TB60 battery adapters
- Battery locker module
- Charge sink
- Contact unit

Figure 1 - DJI M300 Retrofit Kit components
To install the M300 Retrofit Kit, you should follow the below procedure.
1. Fix the contact unit to the landing gear
Mount the contact unit to the M300 landing gear. Make sure the contact unit does not sustain the drone weight. The spring-loaded contacts must be slightly compressed onto the docking system when the drone is on the platform.

Figure 2
2. Install battery adapter
Take out the batteries, attach the TB60 battery adapters on both sides, and then put the batteries back in place to achieve the outcome depicted in Figure 3 below.

Figure 3 - installed TB60 battery adapters
3. Revise and install the battery locker
Revise the battery locker as follows:
- Remove the spring module;
- Install one of the two longer screws provided inside the original clip;
- Add the spacer.

Figure 4.1 - Modified battery locker
Install the revised battery locker, as shown in Figure 4.2 below.
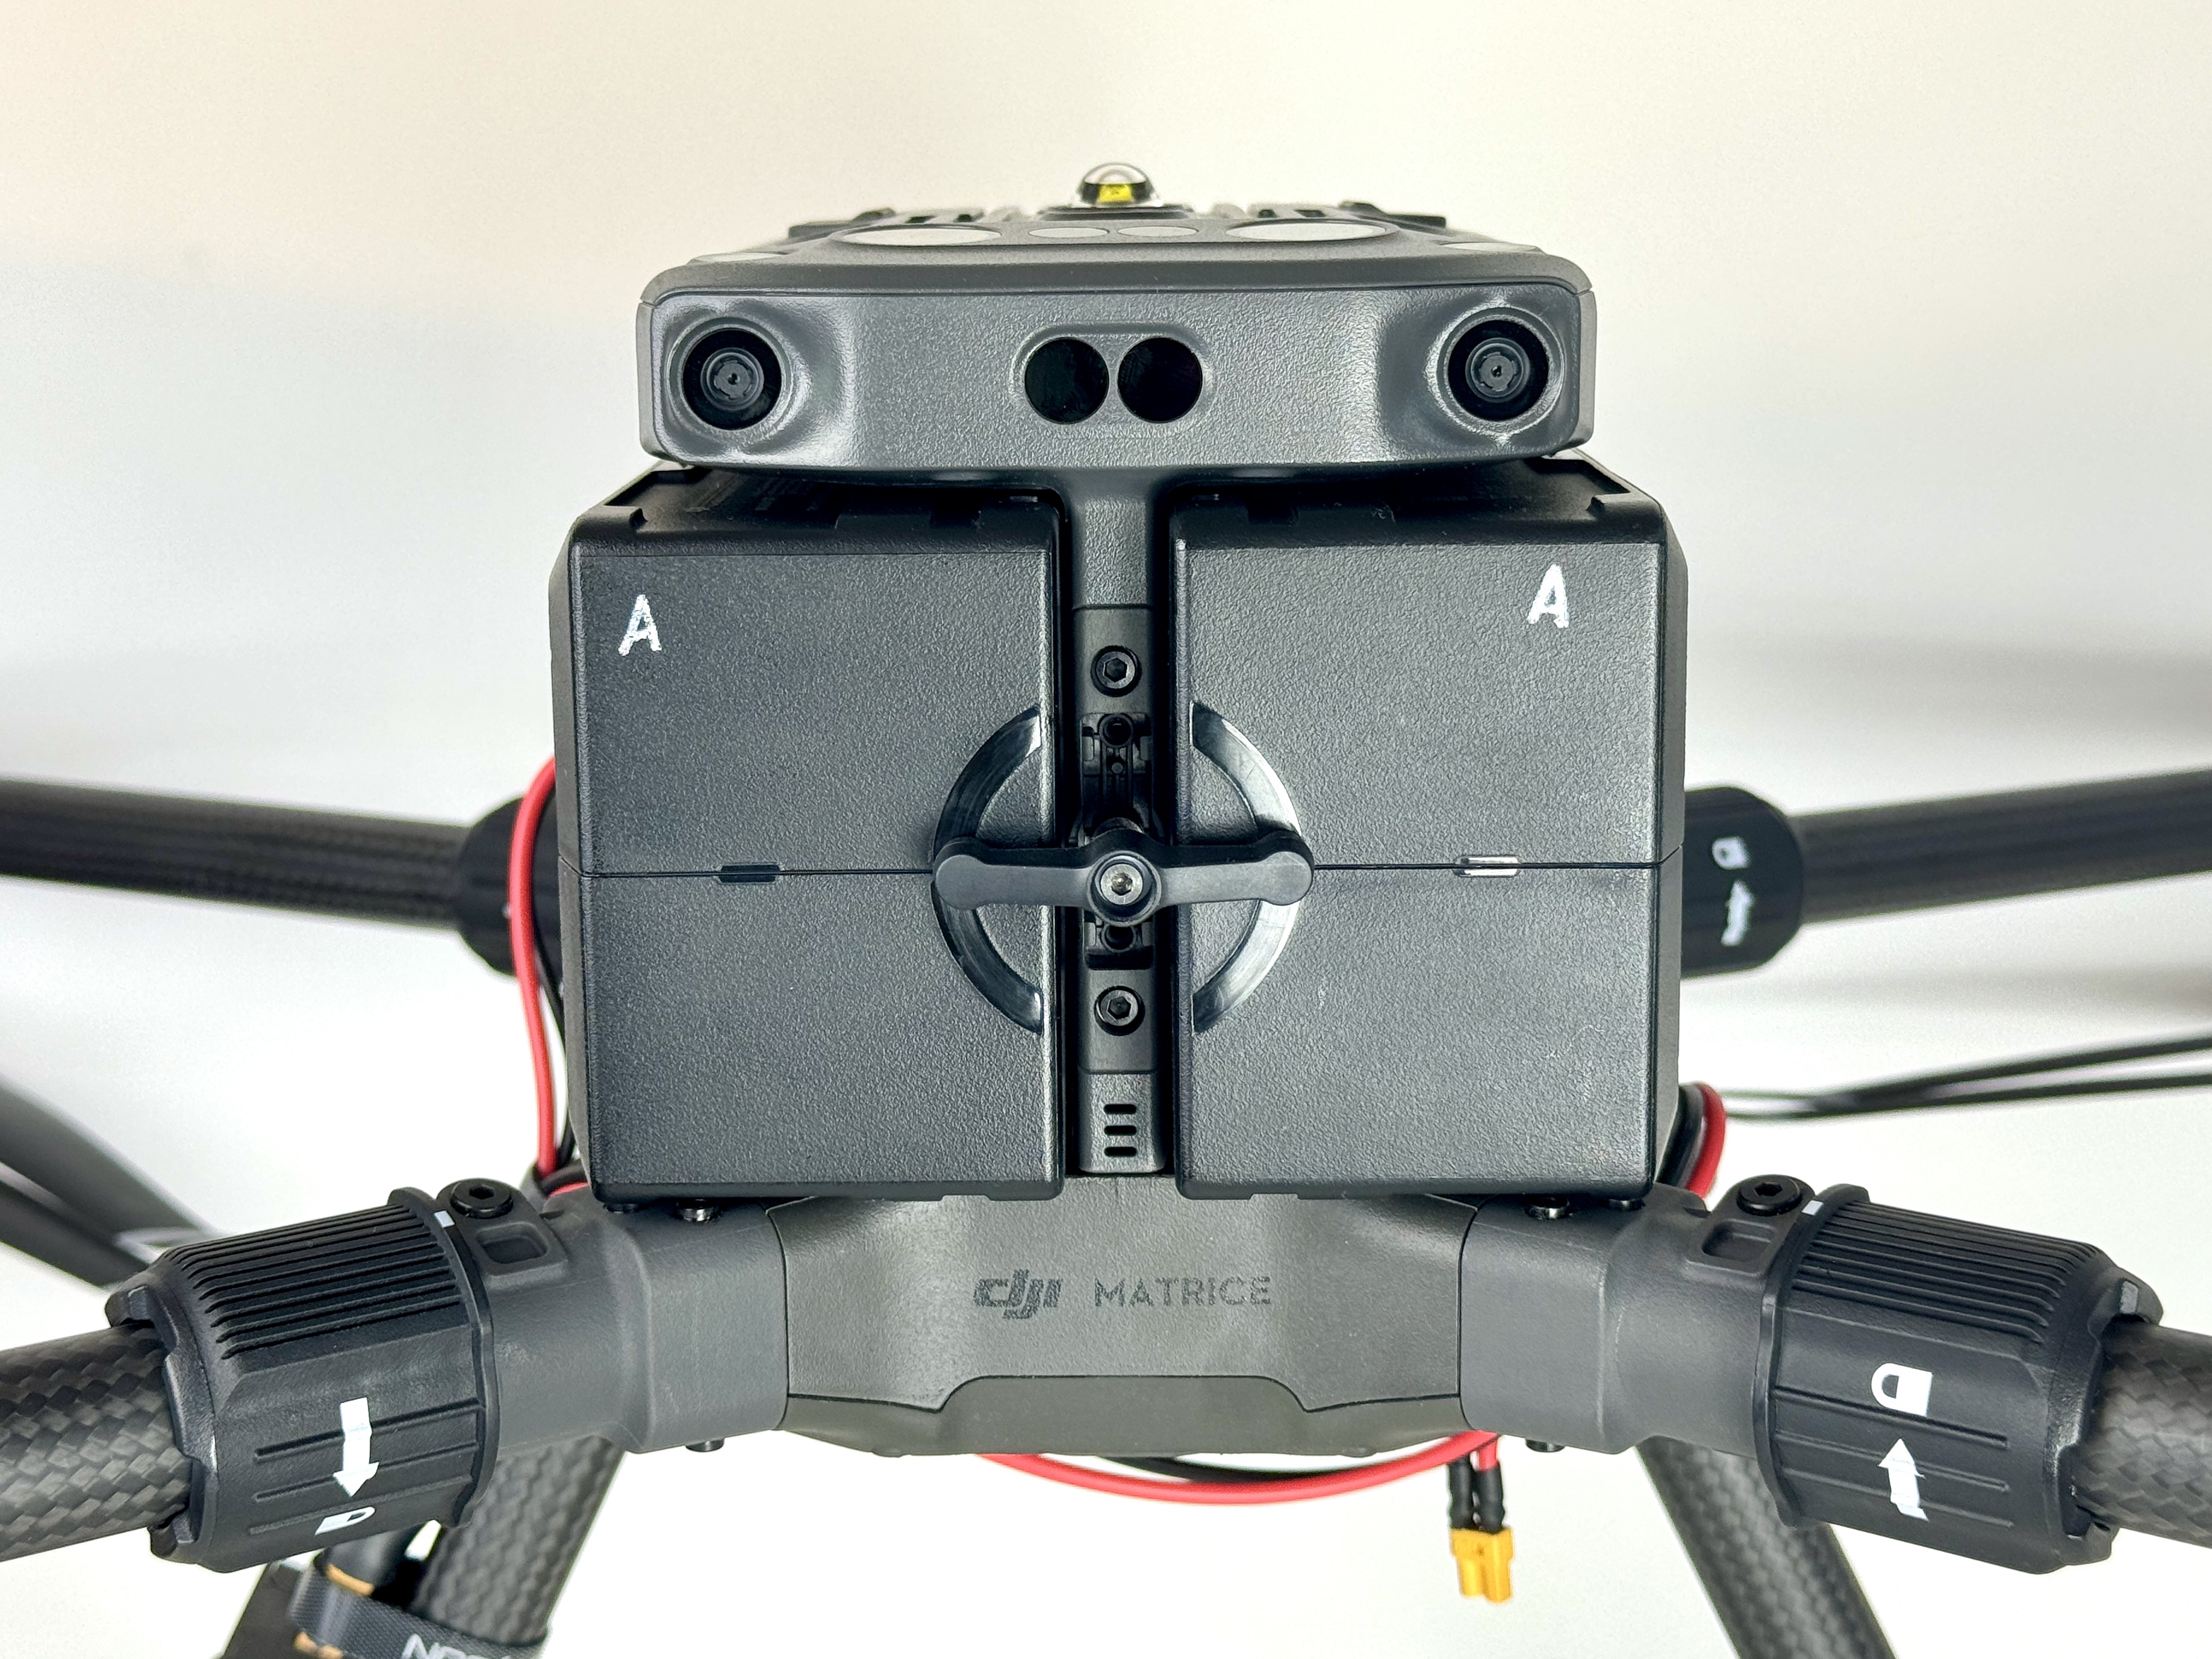
Figure 4.2 - Installed modified battery locker
4. Install the charge sink
Connect the charge sink to the contact unit and to the battery adapters as shown in Figure 5.

Figure 5 - charge sink (PLC) installed and connected to the battery adapters
6. Verify the correct installation
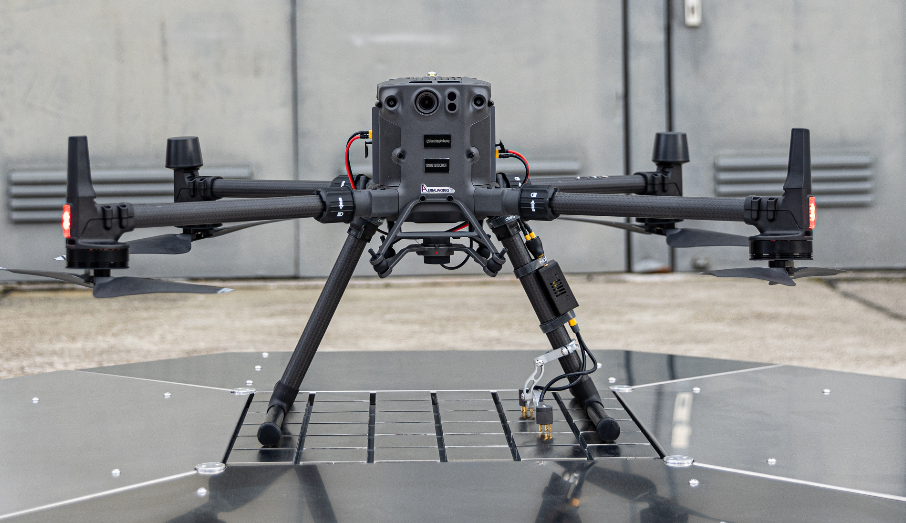
Figure 6.1 - Frontal view of the installed Retrofit Kit

Figure 6.2 - Side view of the installed Retrofit Kit
Updated 11 months ago