DJI Mavic 2 Retrofit Kit

What's in the box
The DJI Mavic Retrofit-kit allows your DJI Mavic drone to automatically charge its battery by landing on the Skycharge Charging Pad. The Retrofit-Kit comes in either the indoor or the outdoor model depending on your charging pad model. The main difference between the indoor and the outdoor model is the contact shape and position.
Retrofit kit components
- External-XT60-connector for the drone battery
- Velcro strip
- Detect-circuit
- Contact-block
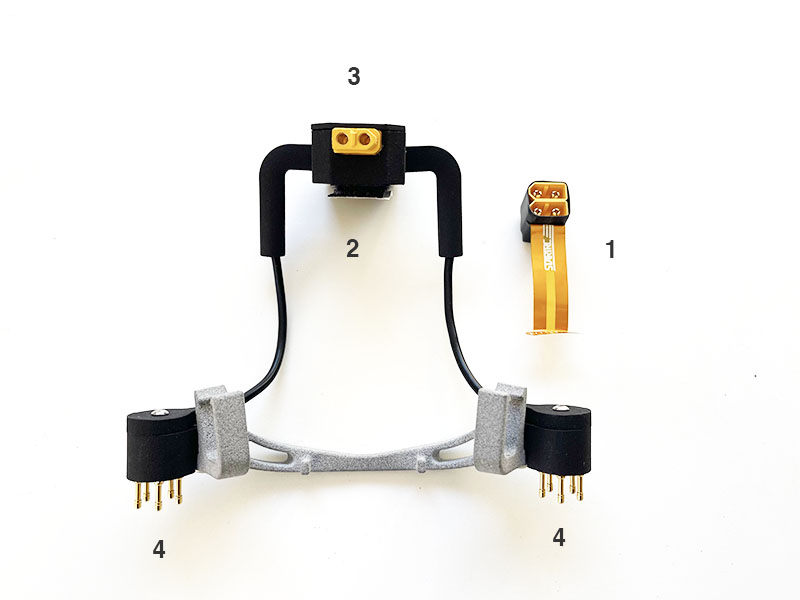
Figure 1 - DJI Mavic Outdoor Retrofit-kit components
To install the Mavic retrofit-kit you should follow the below procedure.
1. Fix the contact-block to the aircraft arms
Unscrew one contact block from the plastic mount as shown in Figure 2.1, 2.2, 2.3;
Snap the contact-block mount onto to the rear aircraft arms and then fix the contact-block back to the plastic mount as shown in Figure 2.4.
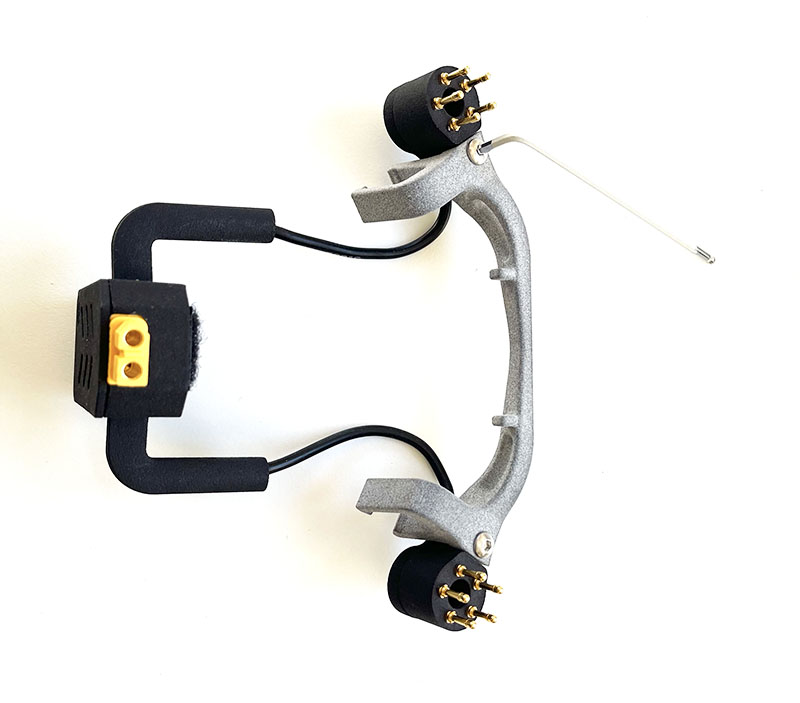
Figure 2.1
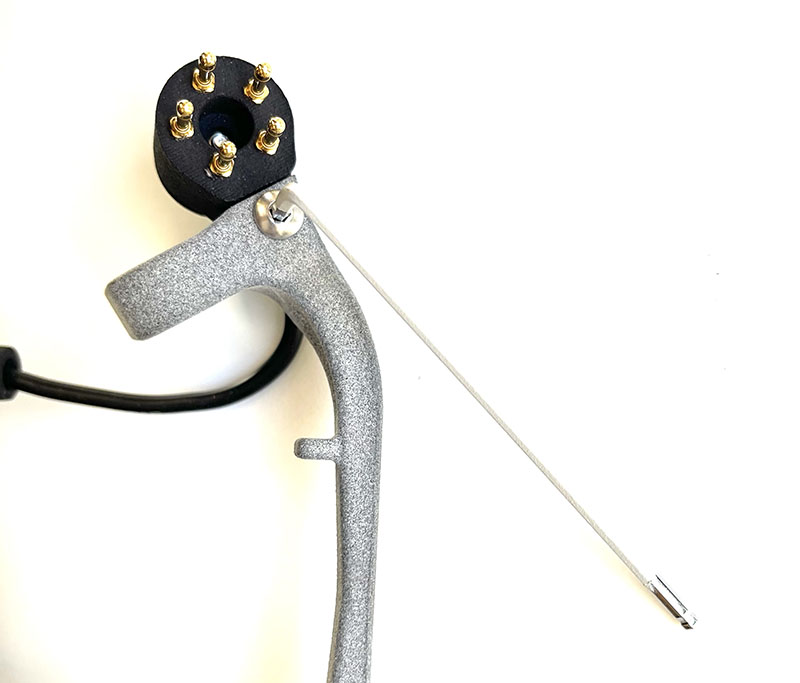
Figure 2.2
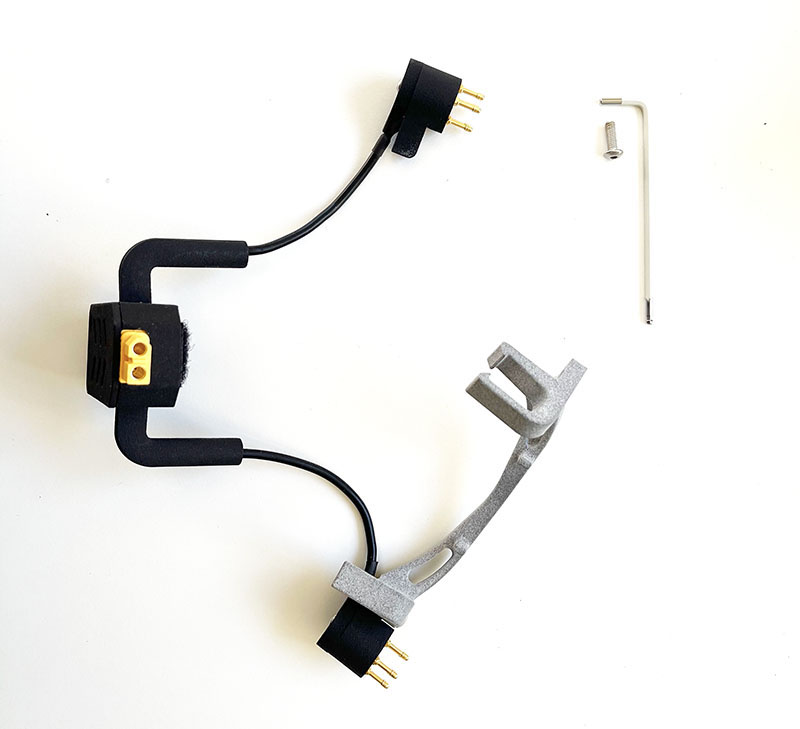
Figure 2.3
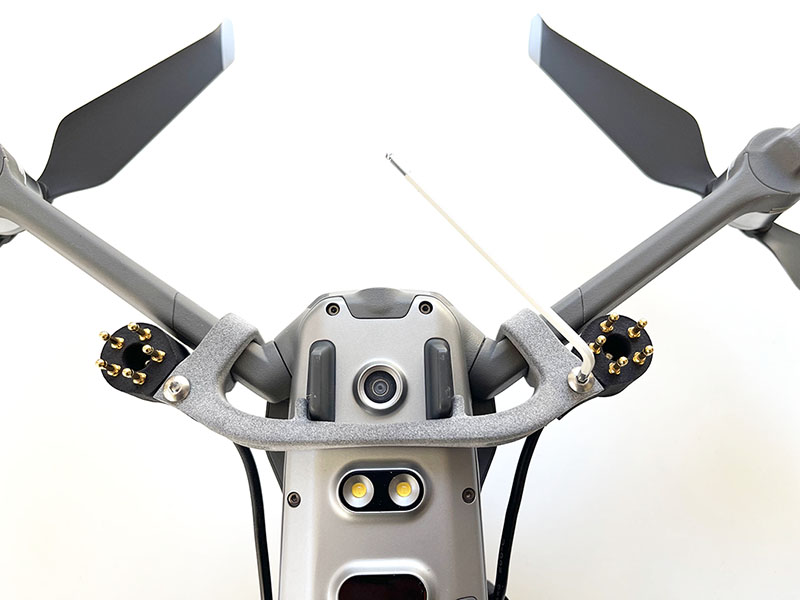
Figure 2.4
2. Install external-XT60-connector
Remove the battery and install the external-XT60-connector as shown in Figures 3.
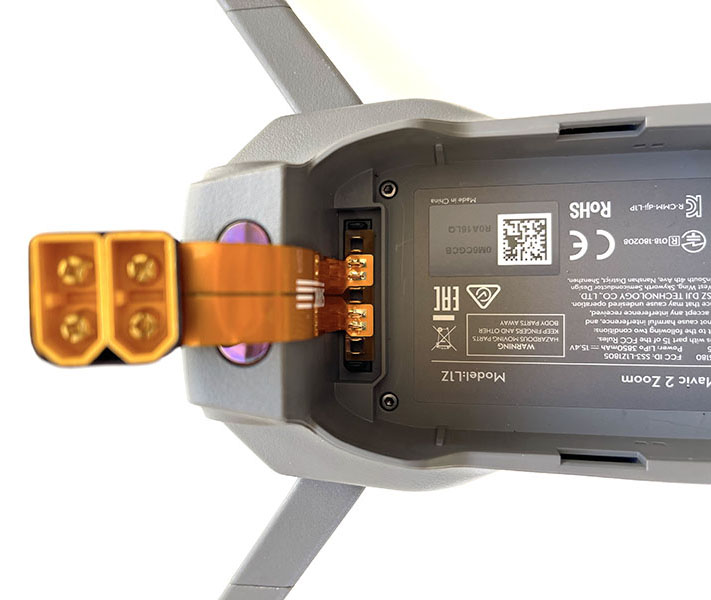
Figure 3 - External-XT60-connector installation on central battery pins
3. Attach the velcro fastener
Install the battery as usual, and attach the velcro fastener on top of the battery near the External-XT60-connector as shown in Figure 4
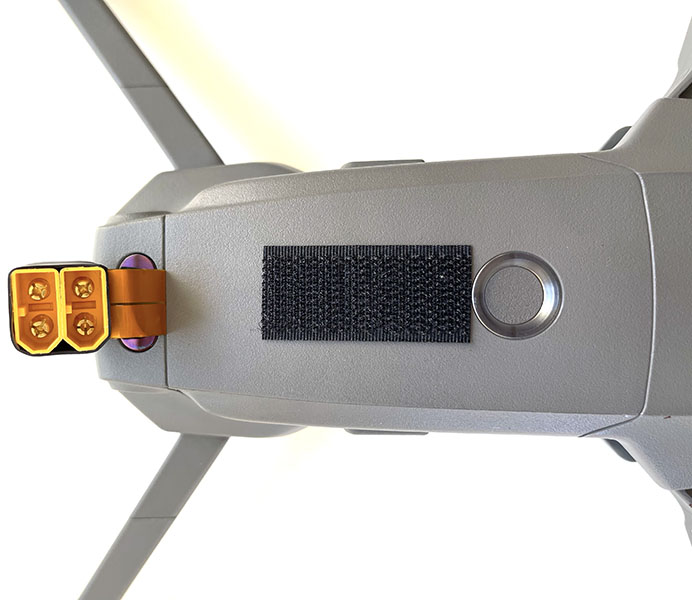
Figure 4 - velcro attached to the battery
4. Install the detect-circuit
Connect the detect-circuit with the upper XT60 connector socket and fix it on the velcro fastener as shown in Figure 5.
ATTENTIONWhile fixing the detect-circuit to the drone you must slide the External-XT60-connector forward in order not to cover the upright infrared sensor. If the upright infrared sensor is covered the drone won't take off.
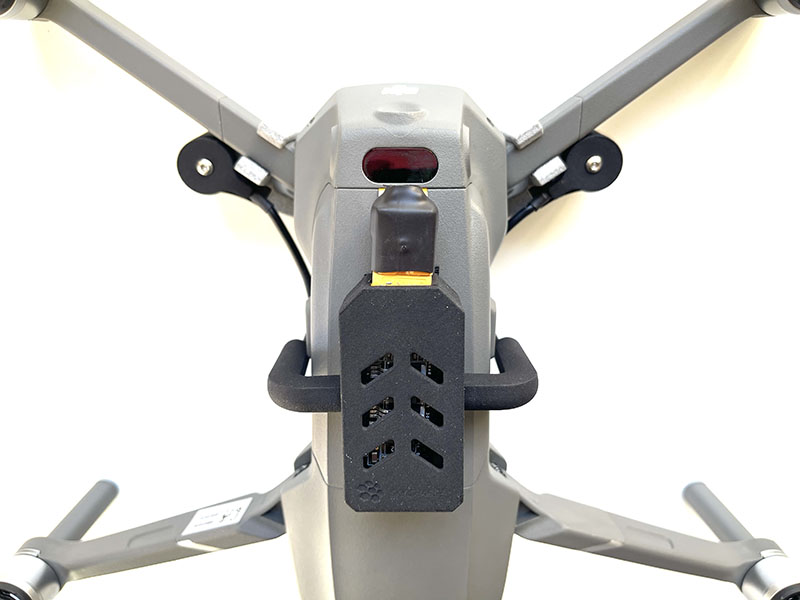
Figure 5 - detect-circuit installed and connected on External-XT60-connector
6. Verify the correct installation
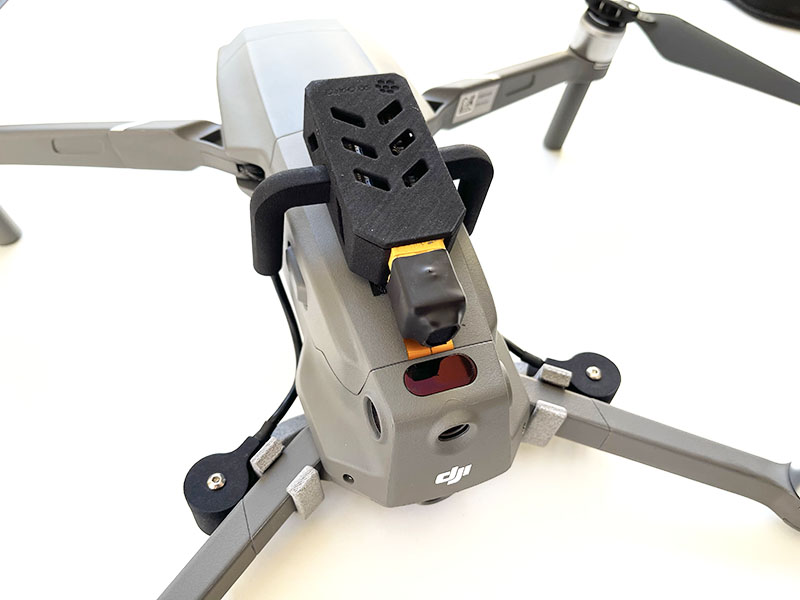
Figure 6.1 - Top view of the installed Retrofit-kit
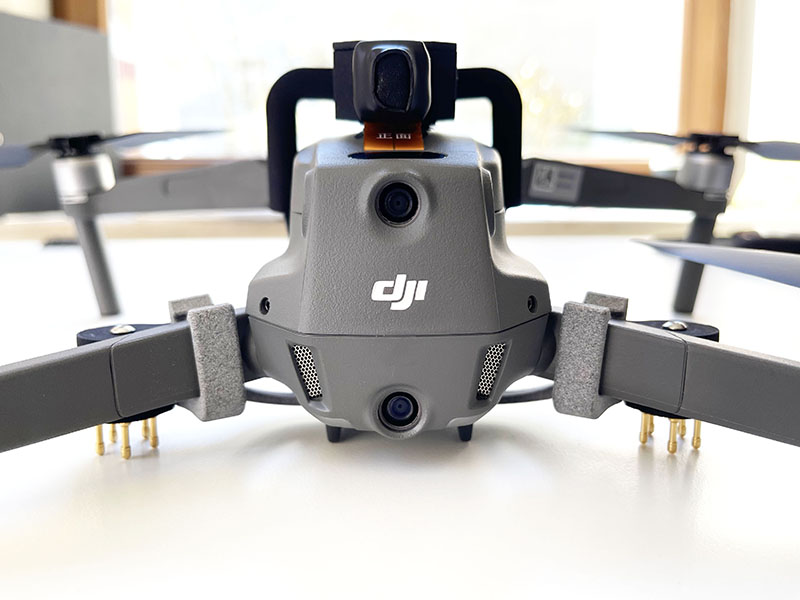
Figure 6.2 - Rear view of the installed Retrofit-kit
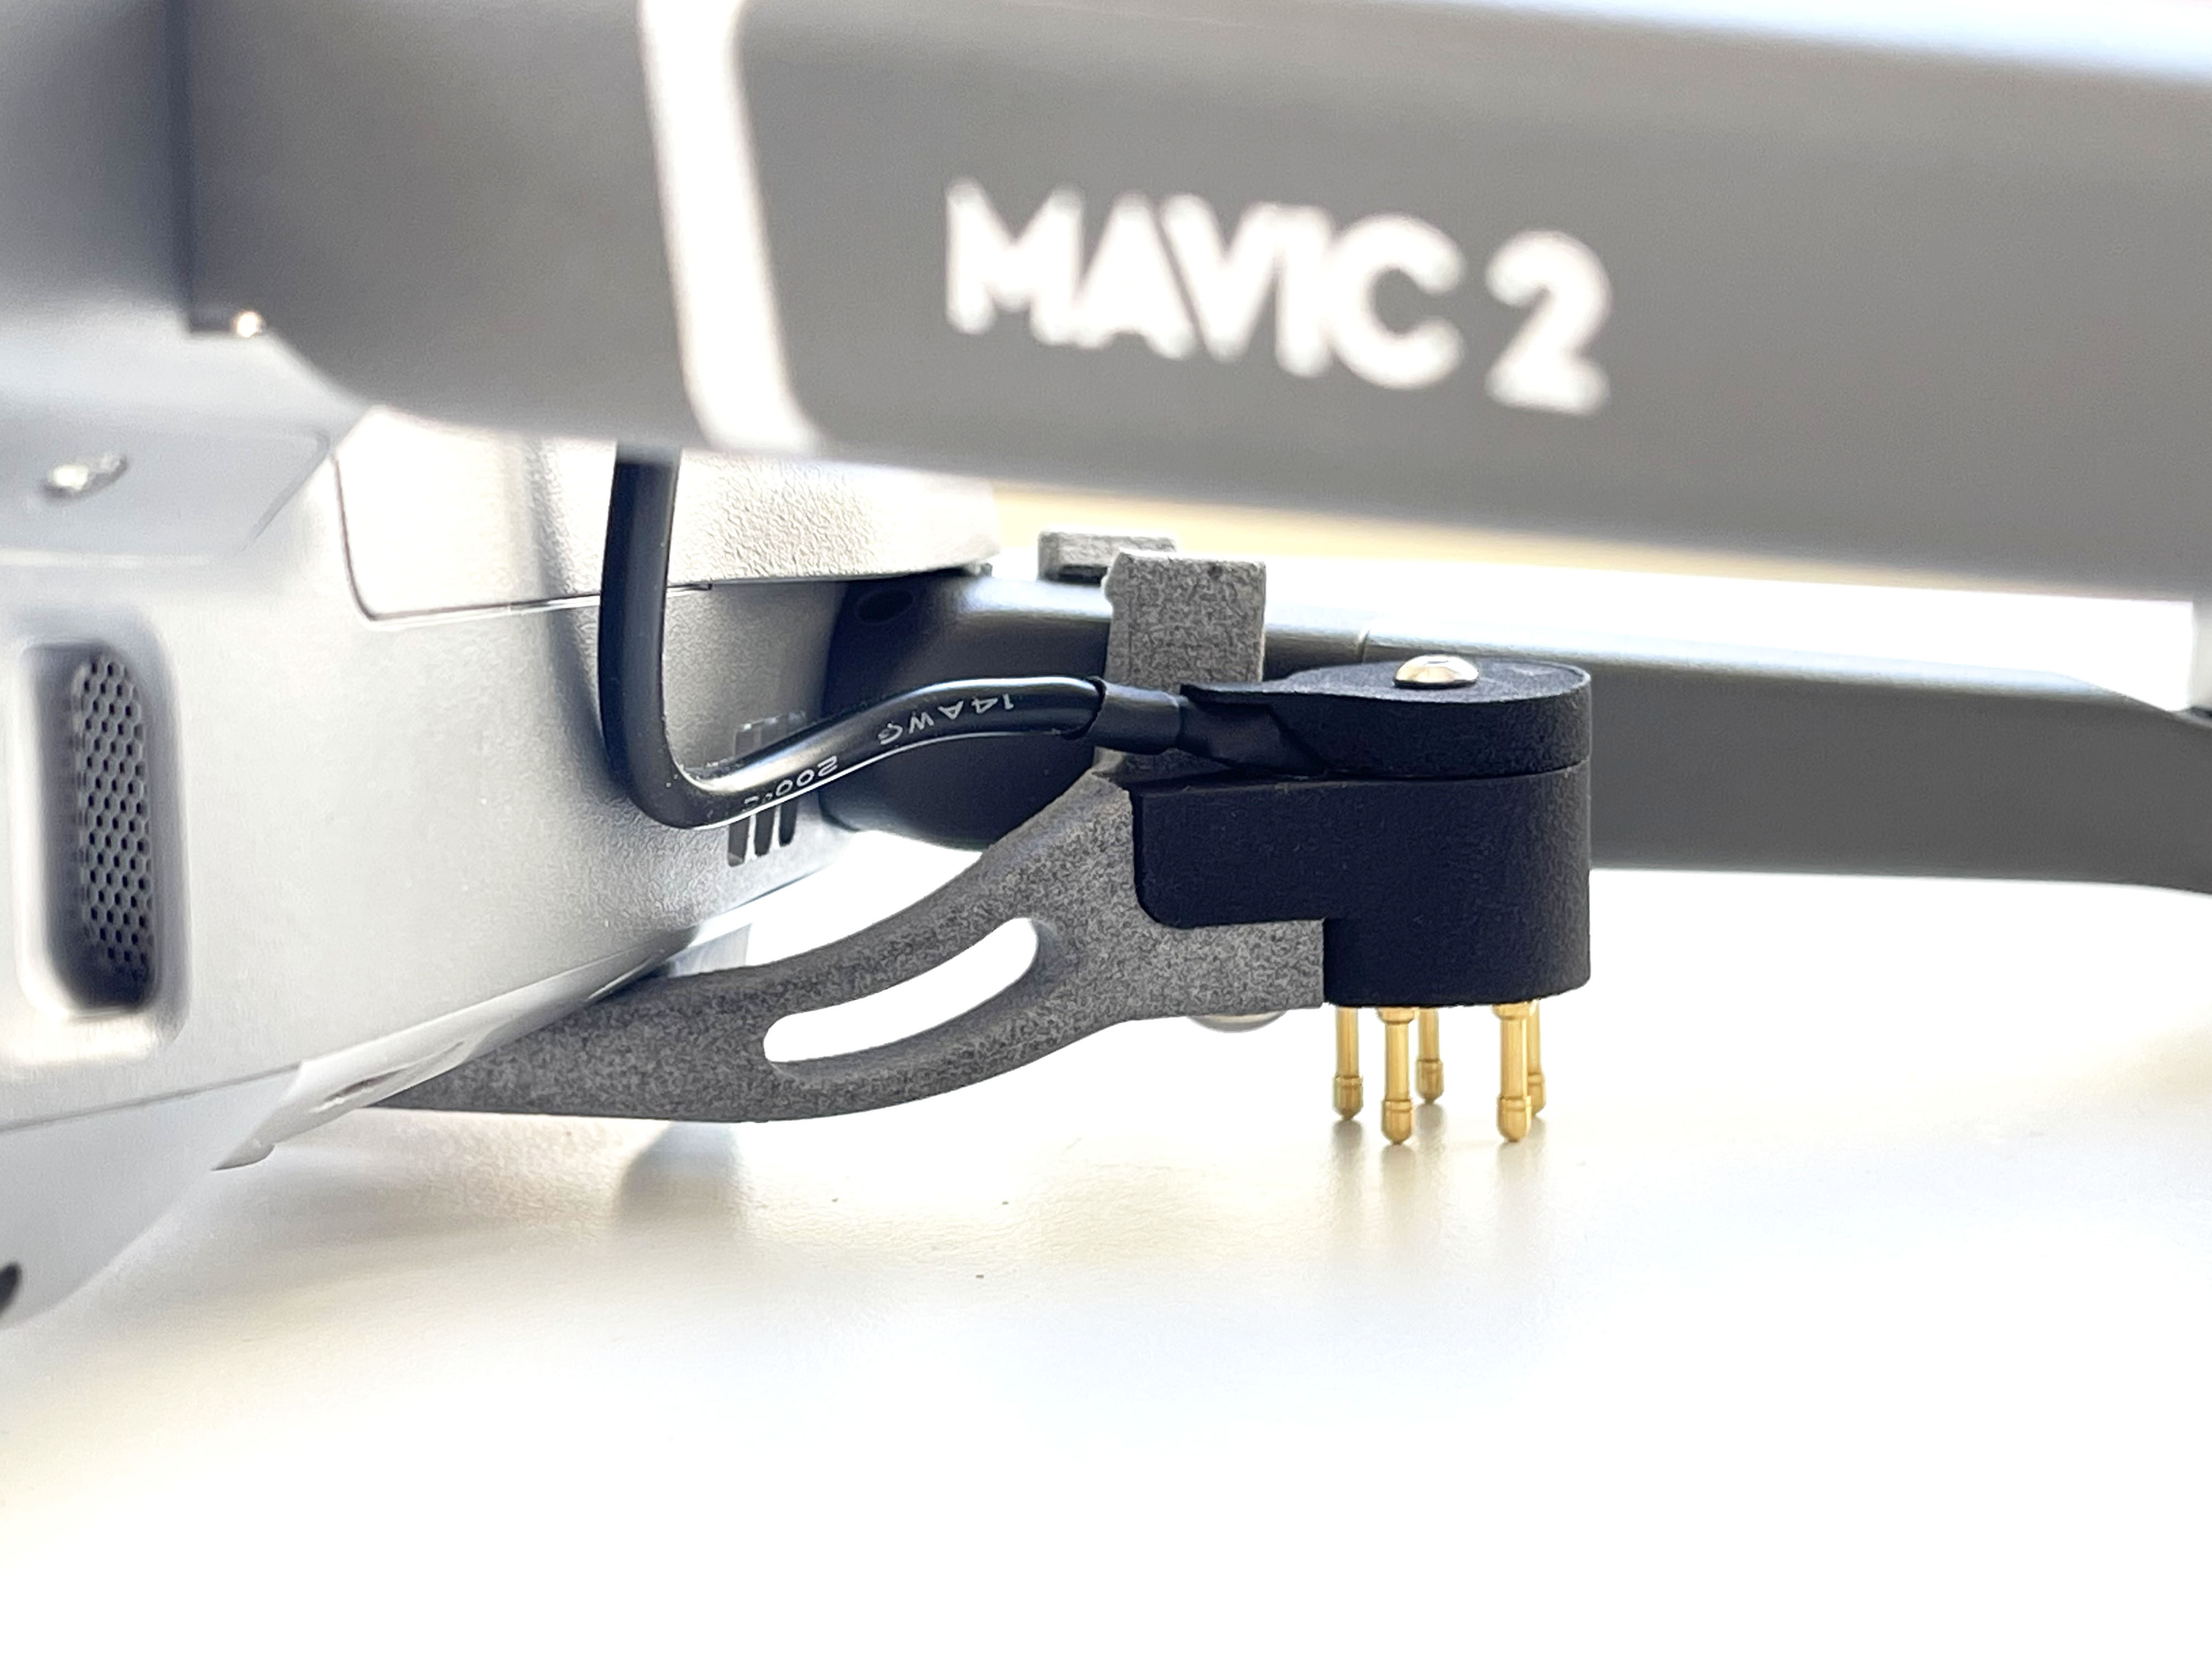
Figure 6.3 - Side view of the installed Retrofit-kit
Updated about 1 year ago
